Hook:
Streamer style, sizes 6 - 10. My first choice is 3xl Tiemco
streamer hooks, size 6. The length of the shank seems to best fit
the length of the woodchuck fur.
Thread:
Danville 3/0, yellow. Though the sample here was tied with
white thread, I prefer yellow. I did switch to yellow when
completing the head.
Tail: A few
orange feather barbs. Mine were from an Whiting hen neck. Cut
the butts off so as to leave room for a lead wire underbody, if
desired.
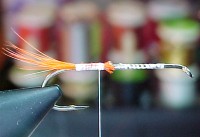
Lead Wire:
About 20 wraps of .015 lead wire. Cover about one-half the
length of the shank. Leave bare shank behind the eye (about 1 1/2 to
2 hook-eye lengths).
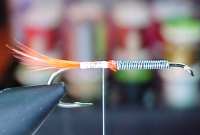
Wire Rib: On
top of the shank (over the tail fibers), tie in a length of medium
diameter copper wire.
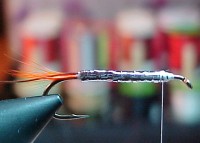
Thread Body:
Cover the entire underbody with thread wraps to create an
even thickness overall. Finish this step with the tying-thread
hanging where shown below:
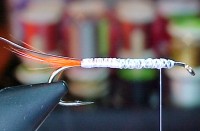
Tinsel: Tie
in a piece of tinsel. With two-colored tinsel, the gold side
should face the tier. When wrapped, this will create an underbody of
silver.
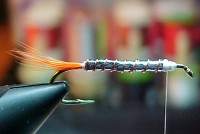
Body: Wrap
the tinsel rearward to create a first layer and then reverse
directions to form the second layer. A few wraps of thread are
used to tie down the tinsel in front, as shown below. Snip off
any excess tinsel and bind down the tag end.
Tying Tip:
Before wrapping the tinsel body, I like to spread head
cement along the top of the shank for added durability.
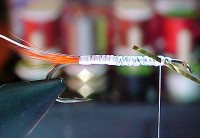
Rib:
Wrap the copper wire forward. This will reinforce the
tinsel and provide some additional weight.
Wing: Snip a
small clump of woodchuck hair and tie it in, creating a wing.
Tying Tip:
Like squirrel tail, woodchuck fur is slippery and
bulky. Therefore, at the tie-in point I put a healthy dab of
head cement on the body before applying the fur. Shown below
is more head cement being applied after the first couple of
thread wraps.

Base For Hackle:
Create a tapered base of thread all the way to the eye,
tightly binding the fur. Below, I have switched to yellow thread for
this step. When the base is completed (not shown), the thread taper
will cover the shank all the way to the eye.

Hackle: Tie
in an orange hen neck hackle, by the tip, as shown. Snip off
the tip and bind down the end to create a smooth platform for
wrapping the hackle.
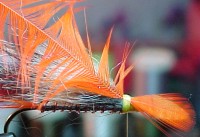
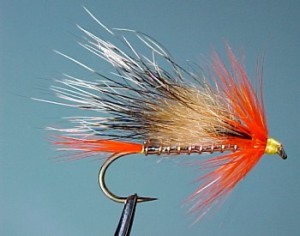
Collar: Shown
below is a collar made with three wraps of hackle.
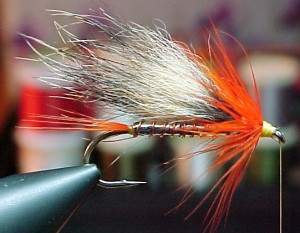
Head:
Complete the Woodchuck Special with a strong head of yellow
thread, finishing off with a couple of whip knots and a coat of head
cement.