|
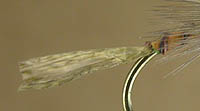
There is no question that parachute hackled
patterns have replaced many of the traditionally hackled dry
flies. There are a number of reasons for this. The parachute
hackle style uses less hackle for more support because each
hackle fiber is spread on top of the meniscus. And, there
are no hackle fibers poking holes in the meniscus. The
meniscus is the surface tension on water that will support
the weight of a needle, providing it doesn’t break through
the meniscus. Parachute hackles will support a fly with the
entire body either in the surface or hanging just below it.
Such patterns are very attractive to trout because they
imitate vulnerable emerging insects. Just about every
traditionally hackled dry fly pattern can be copied with a
parachute style hackle. There are
various methods of fastening parachute hackles to a stem or
“post” base. The posts are made of various artificial or
natural materials and tied vertically onto the hook shank.
Deer or elk hair posts are common, as are hackle stems and
synthetic yarn.
|
 |
|
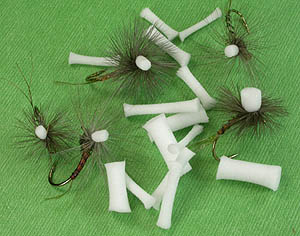
Commercial
fishing floats, often found washed up on beaches,
make excellent sources of closed cell foam. |
However, I tie all my posts using closed
cell foam that I cut from commercial fishing floats. There
is a reason for this. Foam adds floatation and forms a
stiff, but flexible base that makes wrapping hackle around
it easy. The foam used in commercial fishing floats is very
tough and almost impossible to tear. The foam is easy to see
from the surface, but disappears from the trout’s sight
under water. I can vary the thickness of the foam depending
on what I want the pattern to do. I use thick foam and a
heavy hackled fly if I want the pattern to support a
trailing, lightly weighted nymph. But, if I want a sparse
outline I use a thinner piece of foam.
|
 |
|
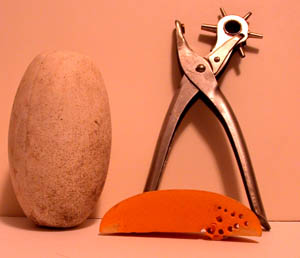
Use a
leather-punch tool to vary the thickness of your
foam posts. |
Although any tough, closed cell foam could
be used as a post, I prefer cutting mine from the
for-mentioned commercial fishing floats and I use a rotary
head leather punch to do so. The leather punch forms little
tubes in a variety of sizes for patterns starting at size 22
hooks up to and including size 6 or 8 hooks. As the leather
punch cuts the foam it compresses it, leaving a little
“foot” at either end. The flared “foot” is easy to catch
with the tying thread. The little foam tubes can also be
used as terrestrial bodies for various patterns such as ants
and beetles; or, for strike indicators.
 |
|
Lumberyard twine
makes an excellent trailing shuck and can be "dyed"
with a waterproof maker. |
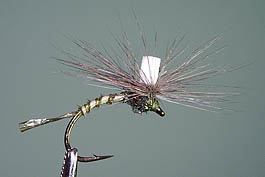
My foam post parachute flies are a style
of tying rather than any particular pattern. However, just
about any dry fly pattern can be copied with a foam post
parachute. I happen to like the Hans Van Klinken style, with
a curved shank hook for my emergers. I use a synthetic
plastic twine for the trailing shuck on emergers, but fine
Antron or Zelon fibers can be used instead. I get my plastic
twine from lumberyards and unravel it into fine sheets.
Despite being very thin, the plastic holds its shape and is
quite tough from side to side, but it splits easily
lengthways. I use moose hair for tails on my adult duns and
spinners. Because most mayflies have grey or dun coloured
wings I use blue dun hackle for most of my patterns. The
parachute hackle doubles as both the wing outline and the
legs of a mayfly.
Tips on tying
attaching a
foam post:
Start with an appropriate foam tube for the
size of hook needed.

Place the foam tube on top of the hook and
about 1/3 of the way back from the hook eye. Catch the front of
the little foam “foot” with the tying thread.
Come around the foam and catch the back part
of the foam on the next wrap.
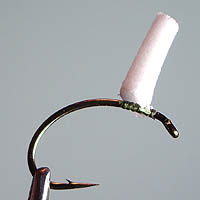
Continue with a series of figure eights and
cross wraps
and slowly compress the foam near the base.
Work on all sides of the foam and go around
the base to run the thread in different directions.
|
Tip: It helps to use 8/0 thread and
have a rotary tying vise so you can see all sides.
|
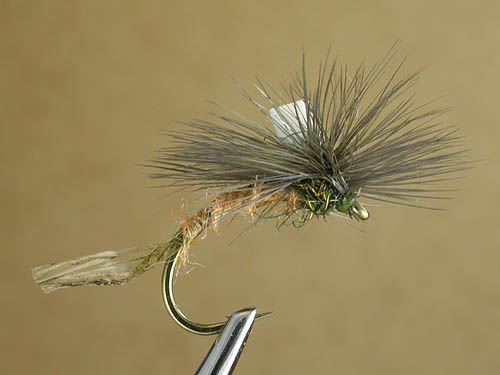
When the entire foam base is covered with
thread it is time to tie the remainder of the fly: tail, body,
and hackle.
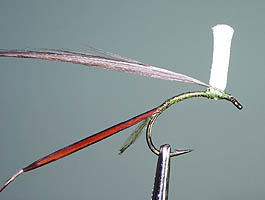
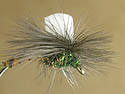
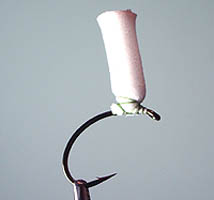
The finished product.
|
Note: After the biot body has
been wrapped forward and tied off behind the post,
the thorax is then dubbed. Wrapping the
hackle. |
|
|